

Hello Folks 🙋🏻♂️, In this article, I will take you through how to create a discord bot using discord.js
Ever Wondered how Discord Bot is created? Ever thought about how can you create your own Discord Bot? Also, wondered if the bot you using on your Discord Server is safe to use. To all these questions We will try to come back with a solution by building a Discord Bot.
Pre-requisites
Code Editor -You have a variety of options for code editors out there. You can choose any But I will choose Visual Studio Code Editor
Create a Discord Account and set up a Discord Server
Understand the basics of Node.js
Step 1: Registering a Bot
To Create a Discord bot the first step is to register the bot with Discord. To do this, click here
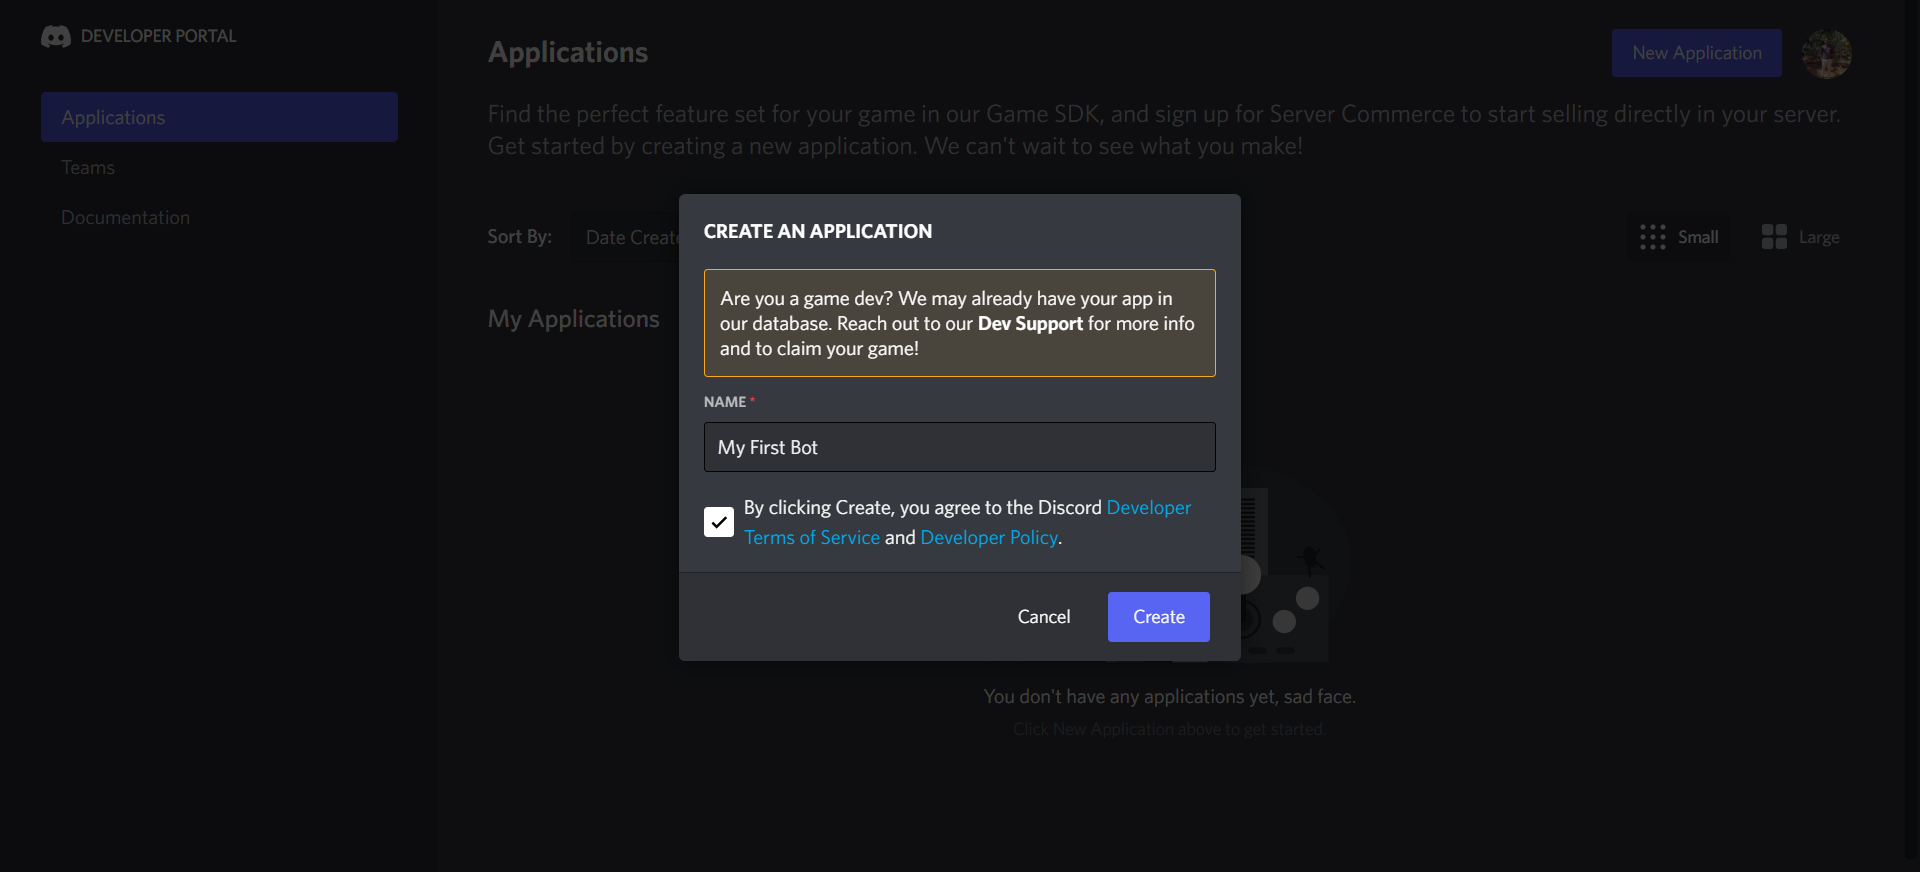
Once You open the Discord Developer Portal. Click on the New Application on the top right. Give a Bot a name and accept the terms and conditions of the developer policy. In the General Information of Discord, you can edit the logo and add descriptions to the bot.
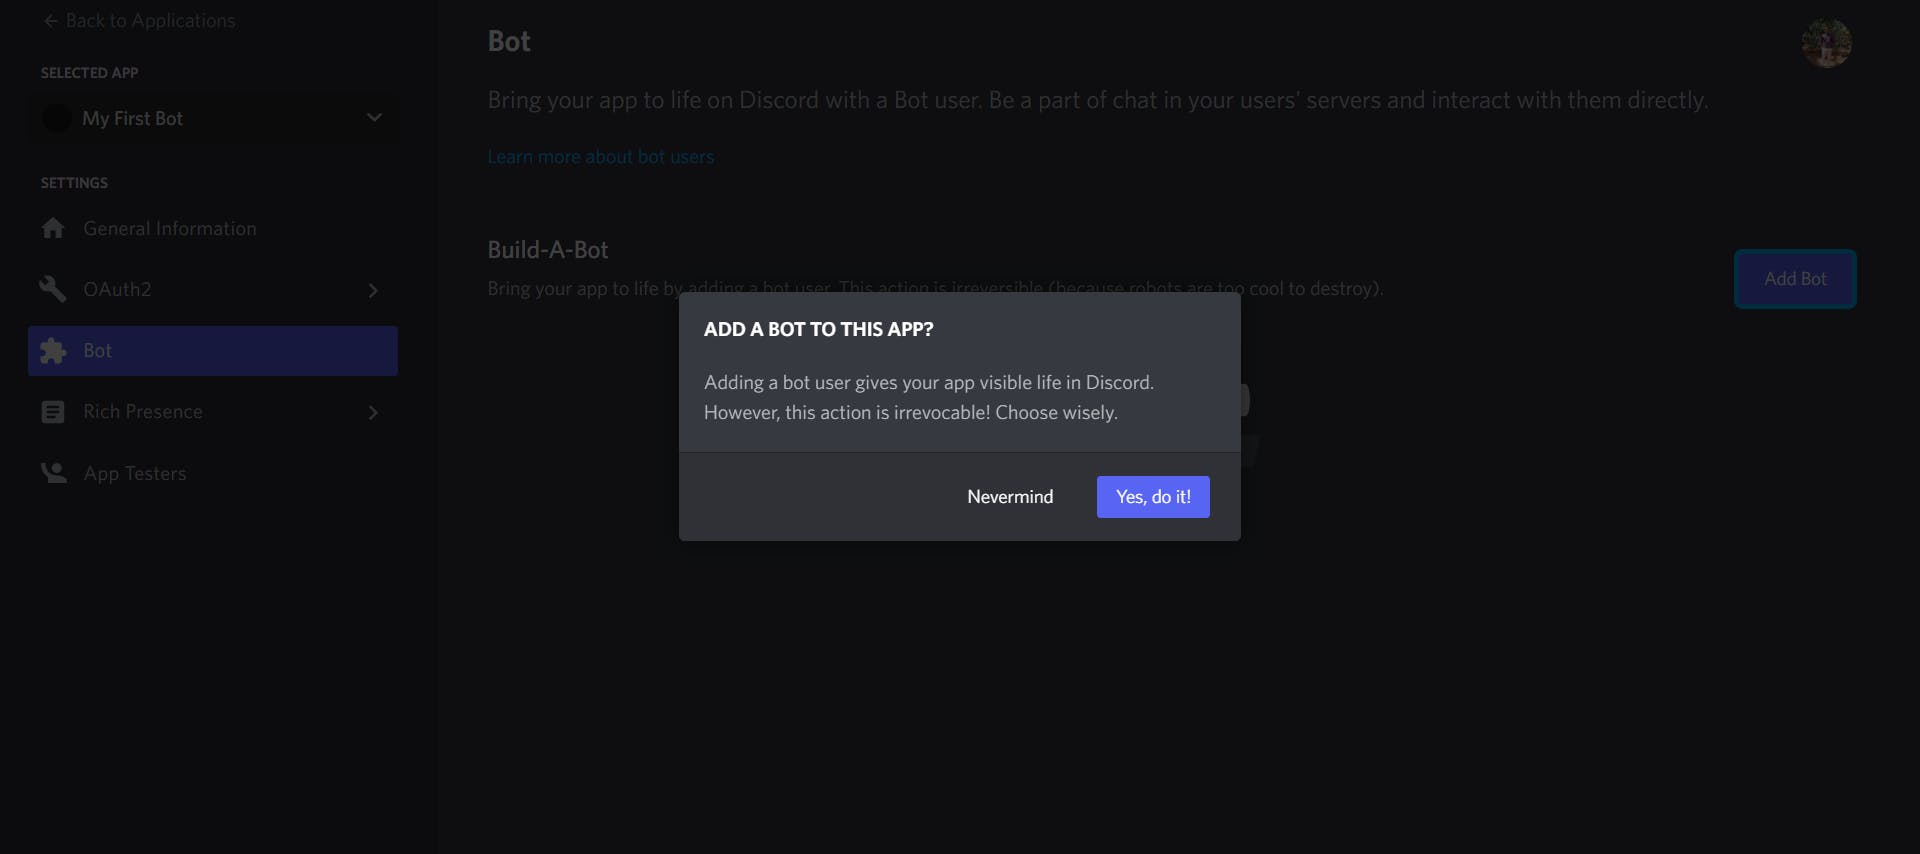
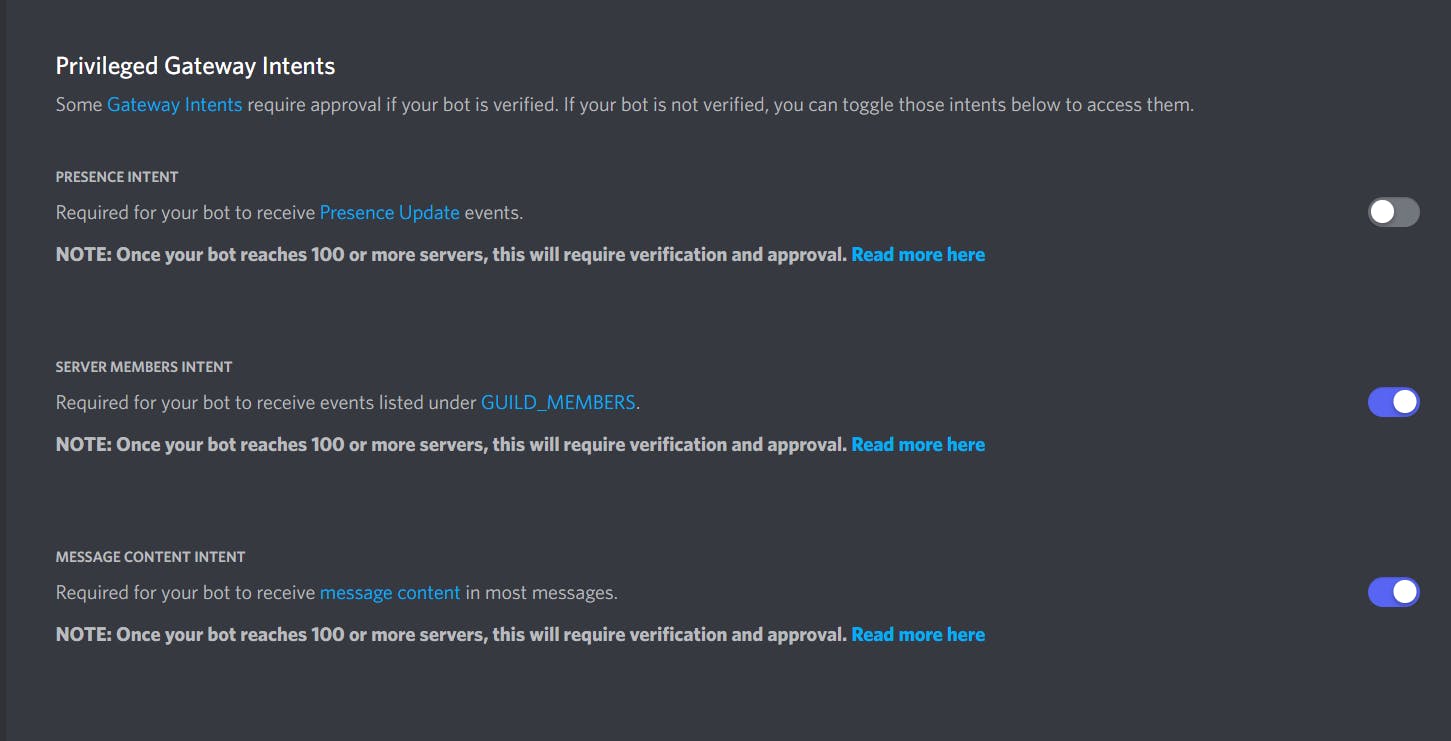
Next, Head over to the Bot tab and click Add Bot and confirm it then enable Server Member Intent and Message Content Intent under Privileged Gateway Intents.
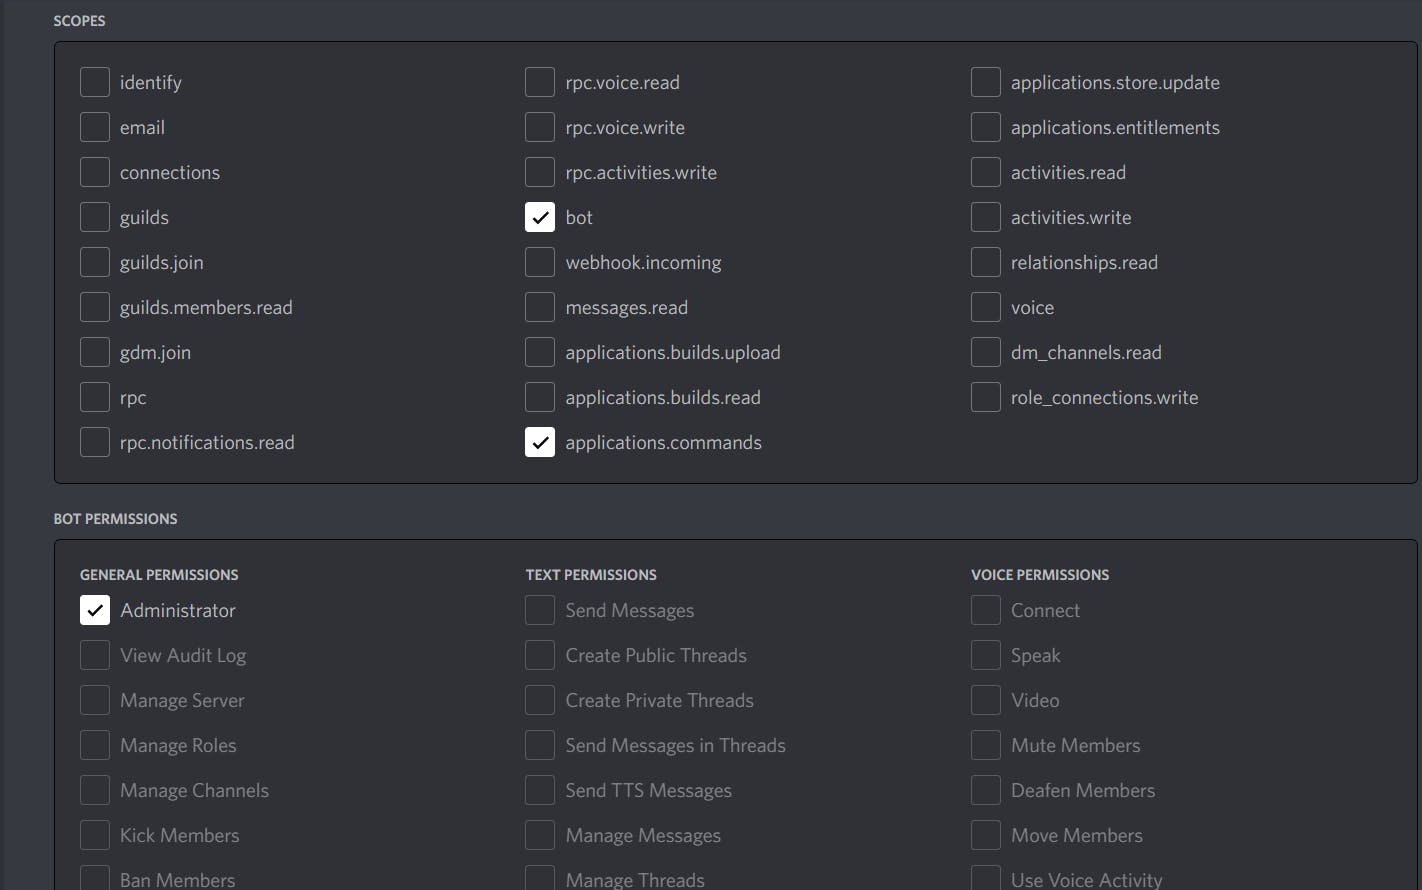
Head over to OAuth2 Tab, Choose URL generator inside Scopes select application.commands and bot, and then in bot permission allow the permission you want. For this case, I will be allowing Administrator Permission.
Copy the Generated URL at the bottom of the page and paste it into the new tab. Add any Discord Server where you want to add the bot and then authorize the bot with permission.
Step 2: Install Dependencies
Firstly Create a Folder specifically for a Bot. I will call it DiscordBot. Now we will create a package.json file. This file allows us to add custom scripts to the development and keep track of the app version and installed dependency. To do this run npm init -y in the terminal.
Now, let's install our dependencies. Dependencies are packages that we can install that allow us to do more with our code, often reducing the amount of code we need to write.
For our bot, we're going to be installing three dependencies:
Discord.js - The Discord library used to create our Discord bot.
dotenv - This is going to allow us to hide certain variables, such as our bot's client ID.
random-number - This package will enable us to create random integers, and float.
To install dependencies, run npm install {package name}. We can install multiple packages by just allowing spaces between packages.
$npm install discord.js dotenv random-number
Step 3: Set Up the environment
To start coding open your preferred editor. I will open VS CODE. Open the Folder you created where the dependency is installed. Create the index.js file in that folder.
Also, create .env a file that will store all secret keys. For this project, we will store the Client Token of the bot.
Now to get the Client Token head back to the discord developer portal In the bot section click on Reset Token and copy the token. Do not share this token with anyone because anybody with this token can make changes to the discord bot.
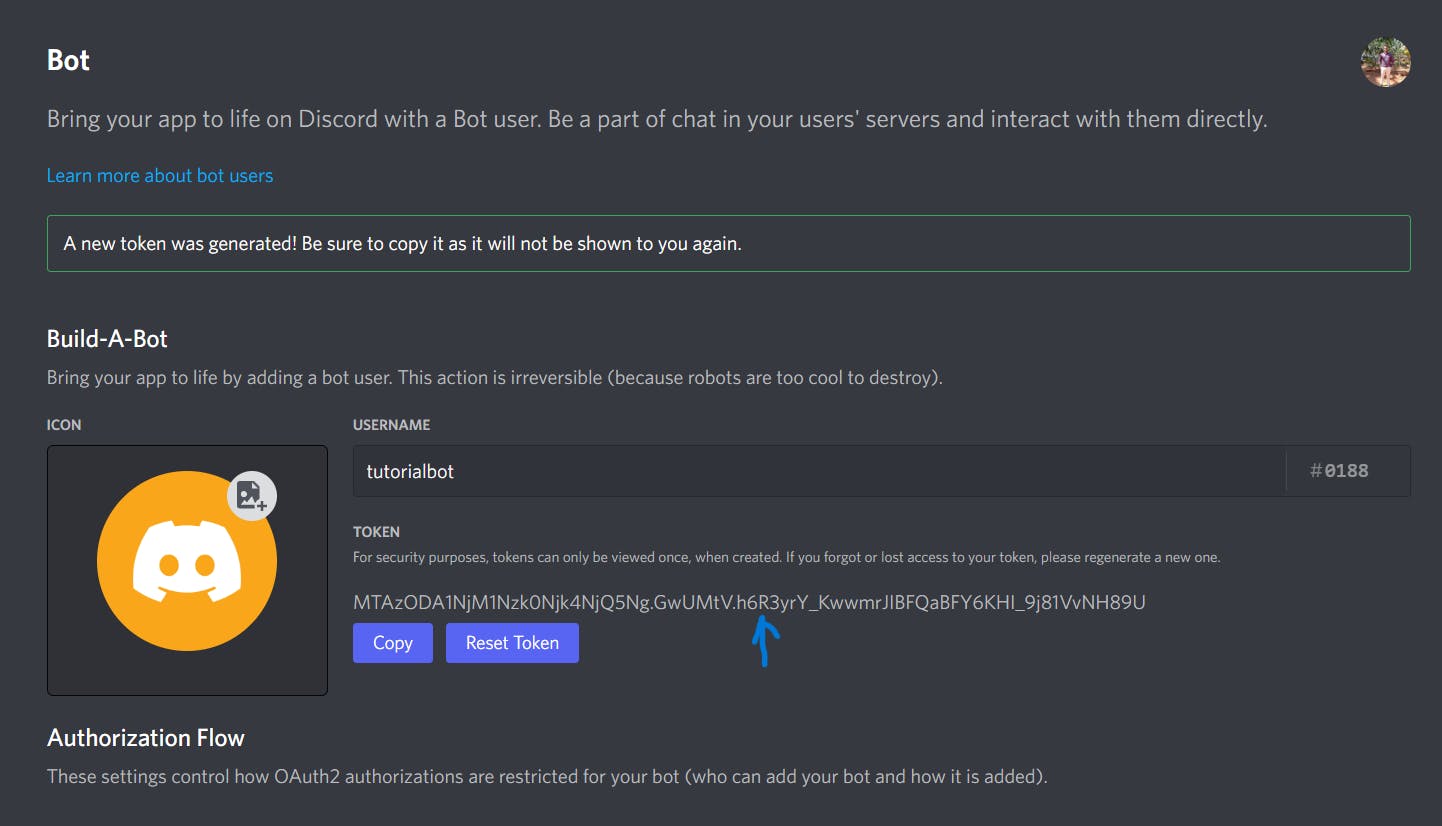
I have displayed the Client Token but I will reset them later on.
Step 4: Let's Start the Coding!!
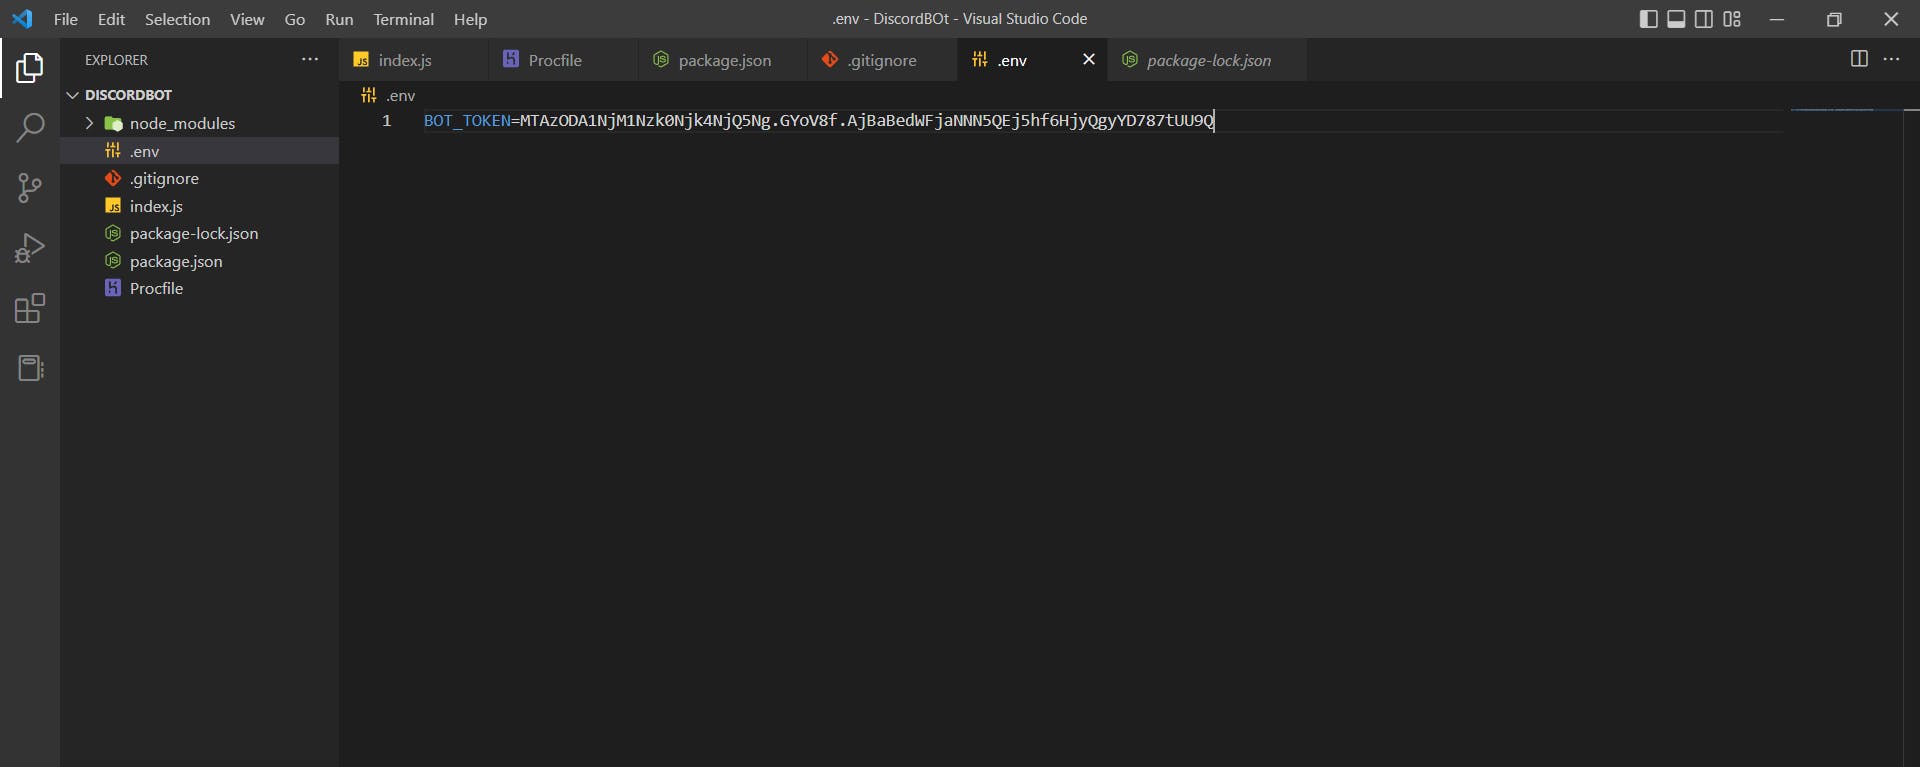
To start we will open .env file and add to the copied token in the key-value format as shown below. This token will be used for a client login
Now we will actually start with the coding part we will import the discord.js package
require('dotenv').config()
const { Client, GatewayIntentBits} = require('discord.js');
const client = new Client({ intents: [GatewayIntentBits.Guilds,GatewayIntentBits.GuildMessages,GatewayIntentBits.MessageContent] });
The client is used for setting up the connection with the Discord Bot and GateWayIntentBits is used for different intents for which the bot will be used.
Firstly we will log in using the client token to do that we will use client.login method
client.login(process.env.BOT_TOKEN)
To make the bot ready we need to execute the "ready" event. This event activates the bot. The bot will become ONLINE.
client.on("ready", () => {
    console.log("Bot is ready")
})
There are hundreds of things that can be done using a discord bot they are messaging, Manage Threads, roles, channels, etc. So to understand this we will build a simple rock paper scissor game. The game will be played between the bot and the user.
To start with it. we need to create a prefix with which our bot will interact. This means the bot will respond to only those messages which begin with the prefix. For our case, we will consider "$" (You can consider the prefix as any special character).
To make the bot respond to the messages entered we need to run the event messageCreate( It should be exactly the same). This event will allow the bot to read the user's message and respond to it.
client.on("messageCreate", message=>{
// Will contain code related to the game
})
Before Going into replying and sending the message. We will focus on creating random moves for this we will use a random-number npm package.
This package will generate random numbers within the min and max provided. The Random npm package has many methods for generating integers, floats, boolean, etc.
const rn = require('random-number')
 var gen = rn.generator({
    min:  0, max:  2, integer: true
  })
  var ran=gen() // Output will be either 0,1,2
We will provide the randomly generated integer to a switch case. Based on the integer we will decide on the move. This is not the best way of doing it but we are doing it to easily generate bot moves.
var move;
    switch(ran){
      case 0: move="scissor";break;
      case 1: move="rock";break;
      case 2: move="paper";break;
    }
Now we will code about responding to users' messages. To do this, we will first create two variables user and bot point outside the messageCreate event.
let userpoint=0;
let botpoint=0
Then first we need to check if the message entered by the user starts with the prefix ("$"). If doesn't start with prefixes we stop the process else we will slice the message by just removing the first character which will be "$" and storing it in a variable.
We will make the stored variable lowercase and check if the entered either restart, rock, paper, or scissor. We will check the corresponding move made by the bot which is generated randomly every time. Whoever wins the point will be incrementing. To show the move made by the bot we will be using the reply method.
message.reply("Replying Message")
And To show the points after every move we will use the method send which will send the message to a specific group.
message.channel.send("Sending Message")
Here channel word specifies the channel through which the user has sent the message.
Now if the user has entered "$restart" the game will reset and any other move string entered by the user other than the above-mentioned one will be considered an Invalid Move.
if(!message.content.startsWith(prefix)) return;
    else{

      // Removing the first character because it is $
      let msg=message.content.slice(1)
      if(msg.toLowerCase()=="restart"){
        userpoint=0
        botpoint=0
        message.channel.send("Game Resetted")
      }
      else if(msg.toLowerCase()=="rock"){
          if(move=="paper")
             botpoint+=1;

          else if(move=="scissor")
             userpoint+=1
          message.reply(move)
          message.channel.send(`User :${userpoint}\n Bot : ${botpoint}`);
      }
      else if(msg.toLowerCase()=="scissor"){
        if(move=="rock")
             botpoint+=1;
        else if(move=="paper")
            userpoint+=1
        message.reply(move)
        message.channel.send(`User :${userpoint}\n Bot : ${botpoint}`);
      }
      else if(msg.toLowerCase()=="paper"){
        if(move=="scissor")
             botpoint+=1;
        else if(move=="rock")
            userpoint+=1
        message.reply(move)
        message.channel.send(`User :${userpoint}\n Bot : ${botpoint}`);
      }
      else{
        message.channel.send("Invalid Move");
      }

    }
To view the Complete Code Click Here⚡and move to the first-branch branch.
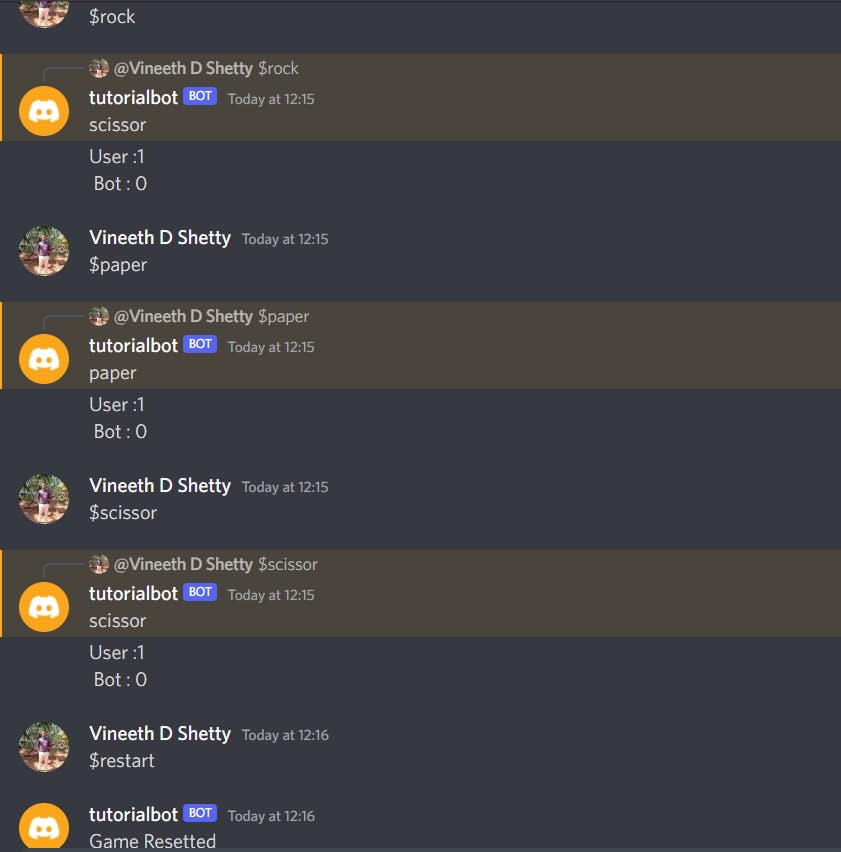
To run the code enternode index in the terminal and then move to the discord server where you have added the bot and test the bot by making moves of rock, paper, and scissors in the screenshot shown below 👇🏽
To know more about how to create a Discord bot click here
And that's a wrap. Thanks for reading !!
If you liked reading this article. Like, Comment down your views, and also share this article with your friends. This is not the end I will be coming up with new articles on various topics so do follow me.
Read more of my work
**My Experience of Building my First NPM Package -ObjectMethods **
How to Add A Favicon for a Website in HTML